How to detect corners using the Harris Corner method in OpenCV
This recipe helps you detect corners using the Harris Corner method in OpenCV
Recipe Objective: How to detect corners using the Harris Corner method in OpenCV?
In this recipe, we are going to understand how to detect corners using the Harris Corner method.
Table of Contents
Step 1: Import the libraries and read the image.
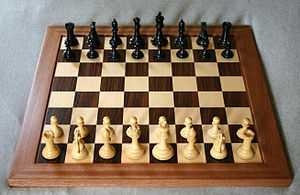
Let us first import the necessary libraries and read the image. The image that we are using here is the one shown below. Let us also convert the image to grayscale for later use.
    import numpy as np

import cv2

image = cv2.imread('chess.jpg')

gray = cv2.cvtColor(image, cv2.COLOR_BGR2GRAY)
Step 2: Harris Corner detection method
This method, of course, involves a lot of mathematical processes running behind the hood. But trying to explain everything might be a little overwhelming. Hence, the basic idea of how it works is described in the following three steps.
- A fixed-size window is made to slide throughout the image and find the window that produces huge intensity variation when moved in both X and Y directions.
- For each such window found, a score R is computed.
- The necessary corners are then selected by applying a threshold to this score. Generally, when R is small, the region is considered a flat region. When R is less than 0, the region is considered an edge, and R is large, the region is considered a corner.
Harris corner detection can be implemented using the cv2.cornerHarris() method, which takes the following arguments.
- src: The input image
- blockSize: The neighborhood window size
- ksize: The aperture for Sobel operator (This value is helpful for the calculation of the R score)
- k: The harris detector free parameter
The cv2.cornerHarris() method takes the input image in np.float32 format. So let us convert our input image to that type.
image_flt = np.float32(gray)

dst = cv2.cornerHarris(image_flt, 2, 3, 0.04)
Step 3: Dilate the output and set a threshold.
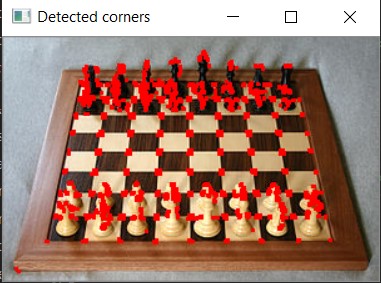
Let us now dilate the output that we received from the cv2.cornerHarris() method using the cv2.dilate() function. The dilated image is then reverted to its original form using the optimal threshold value. Here we consider the product of 0.1 and the maximum value of the dilated image as the optimum threshold. The points that pass the threshold are marked in red to indicate that they are the detected corners.
dst = cv2.dilate(dst, None)

image[dst > 0.01 * dst.max()] = [0, 0, 255]
Step 4: Display the output
Let us now display the output using cv2.imshow() function.
cv2.imshow('Detected corners', image)

cv2.waitKey(0)

cv2.destroyAllWindows()
Output:


What Users are saying..

Anand Kumpatla
ProjectPro is a unique platform and helps many people in the industry to solve real-life problems with a step-by-step walkthrough of projects. A platform with some fantastic resources to gain... Read More