How does template matching work in OpenCV
This recipe explains how does template matching work in OpenCV
Recipe Objective: How does template matching work in OpenCV?
In this recipe, let us understand how template matching works in OpenCV.
Table of Contents
Step 1: Import the libraries and read the input image
Let us first import the necessary libraries and read the image. The image that we are using here is the one shown below. Let us read the image in grayscale this time for better results.

import cv2

import numpy as np

from matplotlib import pyplot as plt

image = cv2.imread("ironman.jpg",0)
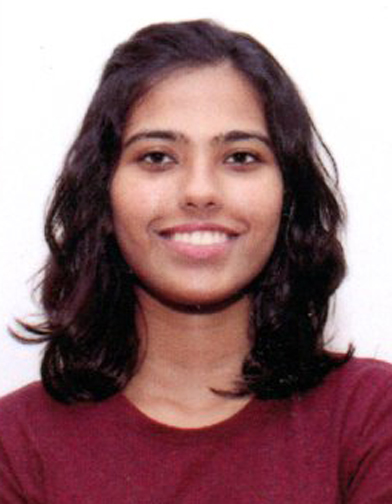
Step 2: Read the template image
Template matching is nothing but searching for a template image inside a larger image. And hence we will need two images in this process. One is the source image, and the other is the template image. Let us now read the template image. The template image that we are using in this example is shown below. Let us also store the template width and height in temp_w and temp_h for later use

    template = cv2.imread('template.jpg',0)

    temp_w, temp_h = template.shape[::-1]
Step 3: Template matching
Now that we have our source and template images ready let us try to find the location of the template image in the source image. This can be done using the cv2.matchTemplate() function, which takes the following arguments.
- image: The source image
- templ: The template image
- method: The method which is to be used to find the template
To put it in a nutshell, the cv2.matchTemplate() function glides the template image over the source image and compares the template with all patches of the source image. The obtained result is compared with a threshold value. Generally, the starting point of the template patch in the source image will have the highest value. Hence, it is enough to consider the location with maximum value.
There are various options available to pass into the method parameter of the cv2.matchTemplate() function. They are :
- TM_SQDIFF
- TM_SQDIFF_NORMED
- TM_CCORR
- TM_CCORR_NORMED
- TM_CCOEFF
- TM_CCOEFF_NORMED
We are going to use the TM_CCORR_NORMED method in this example. It is also important to note that in the case of TM_SQDIFF and TM_SQDIFF_NORMED methods, we should consider the minimum values instead of the maximum values.
    result = cv2.matchTemplate(image,template,cv2.TM_CCOEFF_NORMED)

    min_val, max_val, min_loc, max_loc = cv2.minMaxLoc(result)
The cv2.minMaxLoc() function provides the minimum and maximum values of the given image with their corresponding locations.
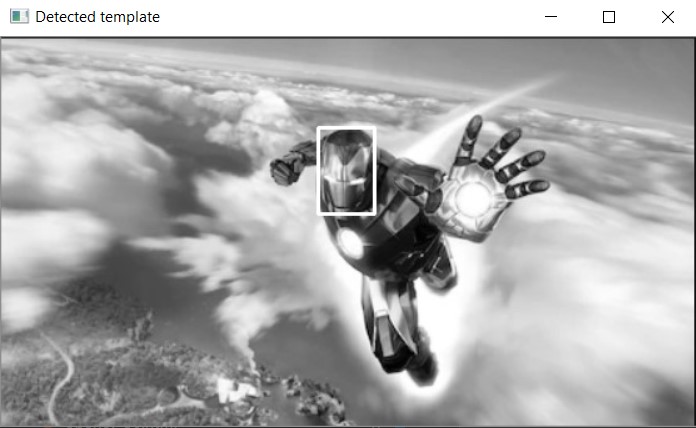
Step 4: Draw a rectangle around the matched area.
We now have the location of the maximum values in the result array. Let us now find out the coordinates of the matched area in the input image and draw a rectangle around it. The coordinates for the rectangle can be found using the width and height of the template image. Finally, we can quickly draw the rectangle using the cv2.rectangle() function.
top_left = max_loc

bottom_right = (top_left[0] + temp_w, top_left[1] + temp_h)

detected = cv2.rectangle(image,top_left, bottom_right, (255,0,0), 2)
Step 5: Display the output
Let us display the output using the cv2.imshow() function.
    cv2.imshow('Detected template',detected)

cv2.waitKey(0)

cv2.destroyAllWindows()
Output:

What Users are saying..
Savvy Sahai
As a student looking to break into the field of data engineering and data science, one can get really confused as to which path to take. Very few ways to do it are Google, YouTube, etc. I was one of... Read More